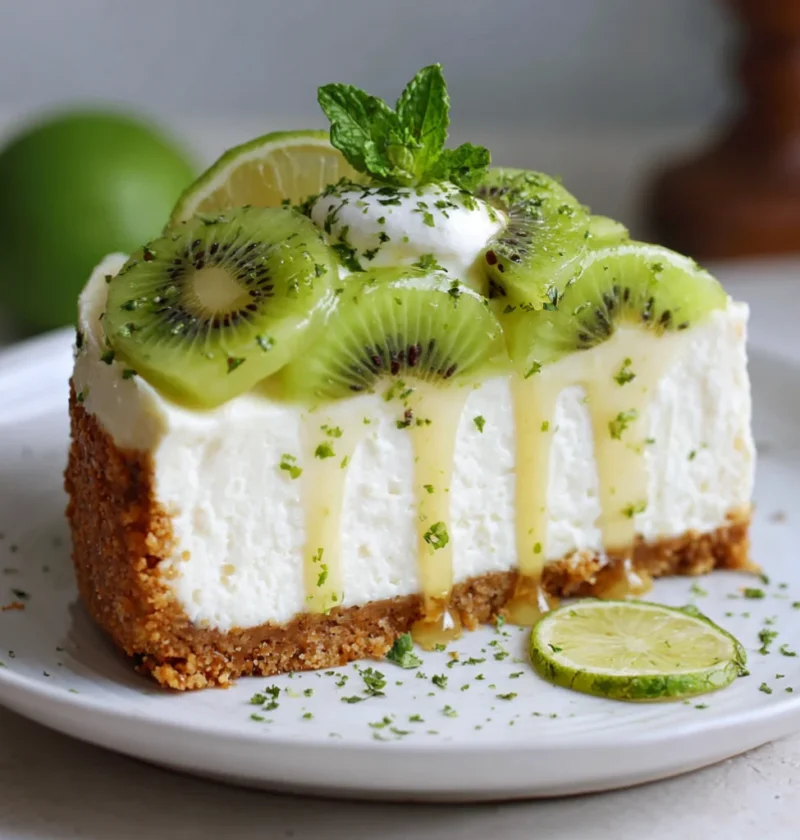
If you’re in search of a light, refreshing dessert that captures the essence of summer, look no further than this No-Bake Kiwi Lime Cheesecake. This creamy cheesecake recipe is perfect for warm days, when you want something sweet but not too heavy. With the vibrant flavors of kiwi and lime, this cheesecake is sure to impress your guests, making it a fantastic choice for gatherings or casual family nights. Plus, the best part? It requires no baking, making it an ideal option for those who want to whip up something quick and easy! The combination of tart lime and sweet kiwi creates a delightful balance that excites the palate, ensuring that each bite is a burst of flavor.
Ingredients
- For the crust:
- 1 ½ cups graham cracker crumbs
- ½ cup unsalted butter, melted
- ¼ cup granulated sugar
- For the filling:
- 16 oz cream cheese, softened
- 1 cup powdered sugar
- 1 cup heavy whipping cream
- 2 tablespoons lime juice (freshly squeezed)
- 1 tablespoon lime zest
- 1 cup kiwi puree (about 4-5 ripe kiwis)
- For the topping:
- 3-4 ripe kiwis, sliced
- Fresh mint leaves (optional, for garnish)
Note: For a gluten-free version, substitute the graham cracker crumbs with gluten-free cookie crumbs. Make sure to use ripe kiwis for the best flavor and sweetness, as they should have a vibrant green color and yield slightly to pressure, indicating ripeness. The quality of your ingredients, particularly the cream cheese and fresh fruits, will significantly affect the final taste of your No-Bake Kiwi Lime Cheesecake.
Steps / Instructions
- Prepare the crust: In a medium bowl, combine the graham cracker crumbs, melted butter, and granulated sugar. Mix until the crumbs are well coated. The mixture should resemble wet sand, ensuring that all the crumbs are moistened for a cohesive crust.
- Form the crust: Press the crumb mixture firmly into the bottom of a 9-inch springform pan, ensuring an even layer. Use the back of a measuring cup to pack it tightly, which will help the crust hold its shape once set. Refrigerate for at least 10 minutes to set; this step allows the butter to firm up, creating a sturdier base.
- Make the filling: In a large mixing bowl, beat the softened cream cheese with an electric mixer until smooth and creamy, about 2-3 minutes. This ensures there are no lumps, resulting in a silky texture for your cheesecake.
- Add sugar and lime: Gradually add the powdered sugar, lime juice, and lime zest. Continue mixing until everything is well combined and smooth. The lime juice not only adds flavor but also helps to balance the sweetness of the powdered sugar.
- Whip the cream: In a separate bowl, whip the heavy cream until stiff peaks form. This will add lightness to your filling, making it fluffy and airy. Be careful not to over-whip, as this can lead to a grainy texture.
- Fold the cream: Gently fold the whipped cream into the cream cheese mixture. Be careful not to deflate the whipped cream; you want the filling to remain airy and light, so use a spatula and a gentle motion to incorporate.
- Add kiwi puree: Stir in the kiwi puree gently until just combined, creating a beautiful green color throughout the filling. The puree should be smooth, so blend your kiwis until there are no chunks.
- Fill the crust: Pour the kiwi lime filling over the chilled crust. Use a spatula to smooth the top, ensuring an even layer for a polished look. Cover the cheesecake with plastic wrap and refrigerate for at least 4 hours, or preferably overnight, to allow it to set fully. This chilling time is crucial for achieving the perfect sliceable consistency.
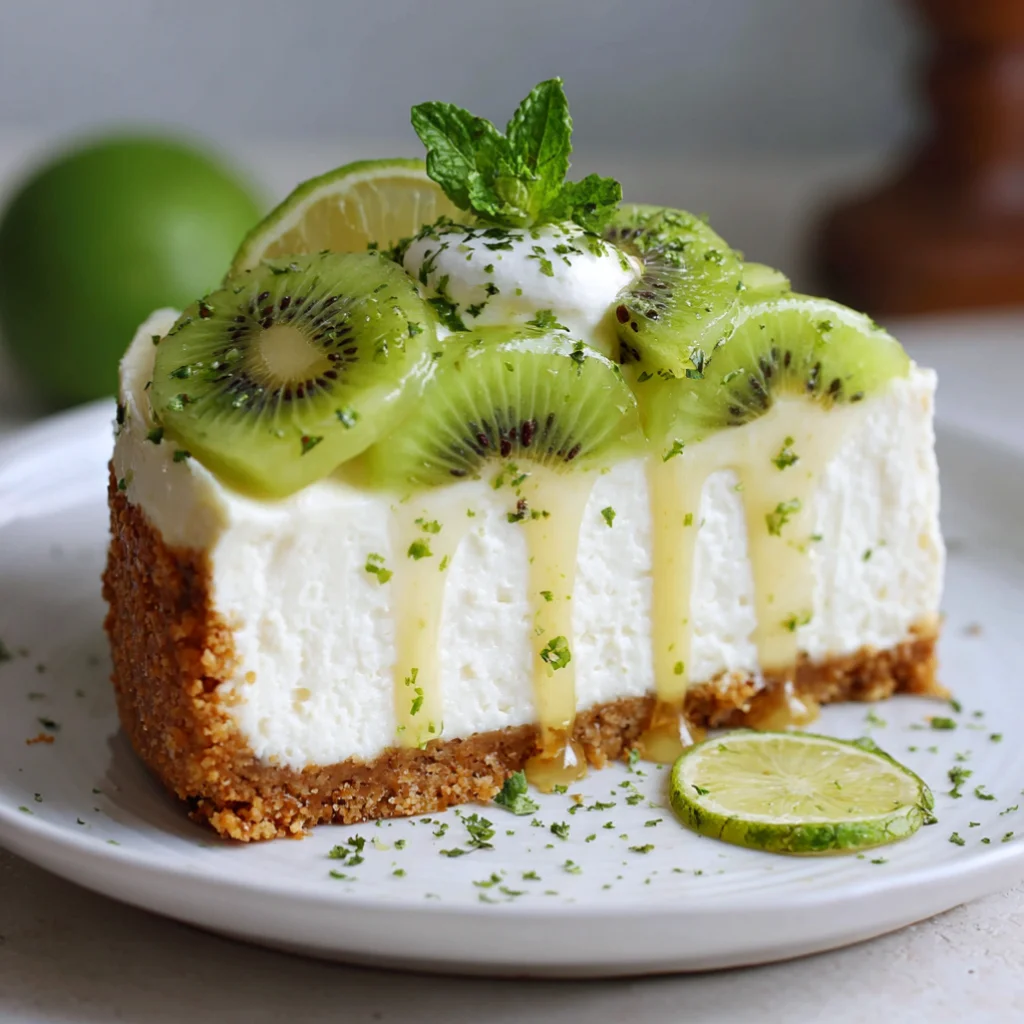
- Prepare the topping: Once the cheesecake is set, remove it from the springform pan. Arrange the sliced kiwis on top of the cheesecake, creating an eye-catching design. For an elegant touch, scatter fresh mint leaves around the edges, adding a pop of color and freshness.
- Serve: Slice and serve chilled. Enjoy your light and refreshing No-Bake Kiwi Lime Cheesecake! This dessert is best enjoyed cold, so keep it refrigerated until serving, and garnish just before presenting to your guests.
Tips & Tricks
- For a smoother filling, ensure the cream cheese is at room temperature before mixing. This will help prevent lumps, creating a silky texture that melts in your mouth.
- If you have leftover cheesecake, store it covered in the refrigerator for up to 5 days. It can also be frozen for up to one month—just be sure to wrap it well to prevent freezer burn, and thaw it in the fridge before serving.
- For a richer flavor, consider adding a splash of coconut cream to the filling, enhancing the tropical notes and adding a creamy texture.
- Be mindful of the ripeness of your kiwis; overly ripe fruit may make the filling too liquid. Choose kiwis that are firm but slightly yielding when gently pressed for the best results.
- To avoid a soggy crust, ensure the crust is pressed down firmly and allowed to chill before adding the filling. This will help it maintain its structure and provide a nice crunch.
Variations
While this No-Bake Kiwi Lime Cheesecake is delicious as is, you might want to explore various adaptations: Check out our related guide for more tips.
- Alternate fruits: Substitute kiwi with other tropical fruits like mango or passionfruit for a different flavor profile, or mix and match for a colorful topping.
- Vegan option: Replace cream cheese with a vegan cream cheese alternative and use coconut cream for the whipped topping, making this dessert accessible to those on a plant-based diet.
- Flavor twists: Mix in a teaspoon of vanilla extract or a different citrus zest for added complexity in flavor. This can enhance the overall taste and provide a unique twist.
With its vibrant colors and delightful taste, this No-Bake Kiwi Lime Cheesecake is the perfect addition to your collection of no-bake dessert ideas. Whether you are hosting a summer gathering or just treating yourself, this refreshing cheesecake is sure to delight everyone at the table! The balance of flavors and textures makes it an irresistible choice for dessert lovers everywhere.
No-Bake Kiwi Lime Cheesecake
This creamy cheesecake recipe is perfect for warm days, when you want something sweet but not too heavy. With the vibrant flavors of kiwi and lime, this cheesecake is sure to impress your guests, making it a fantastic choice for gatherings or casual family nights.
Ingredients
- 1 ½ cups graham cracker crumbs
- ½ cup unsalted butter, melted
- ¼ cup granulated sugar
- 16 oz cream cheese, softened
- 1 cup powdered sugar
- 1 cup heavy whipping cream
- 2 tablespoons lime juice (freshly squeezed)
- 1 tablespoon lime zest
- 1 cup kiwi puree (about 4-5 ripe kiwis)
- 3-4 ripe kiwis, sliced
- Fresh mint leaves (optional, for garnish)
Directions
In a medium bowl, combine the graham cracker crumbs, melted butter, and granulated sugar. Mix until the crumbs are well coated.
Press the crumb mixture firmly into the bottom of a 9-inch springform pan, ensuring an even layer. Refrigerate for at least 10 minutes to set.
In a large mixing bowl, beat the softened cream cheese with an electric mixer until smooth and creamy, about 2-3 minutes.
Gradually add the powdered sugar, lime juice, and lime zest. Continue mixing until everything is well combined and smooth.
In a separate bowl, whip the heavy cream until stiff peaks form.
Gently fold the whipped cream into the cream cheese mixture.
Stir in the kiwi puree gently until just combined.
Pour the kiwi lime filling over the chilled crust. Cover with plastic wrap and refrigerate for at least 4 hours, or preferably overnight.
Once the cheesecake is set, remove it from the springform pan. Arrange the sliced kiwis on top.
Slice and serve chilled.
Recipe Reviews
- ★★★★★
Excellent recipe!
Leave a Reply
Your email address will not be published. Required fields are marked *