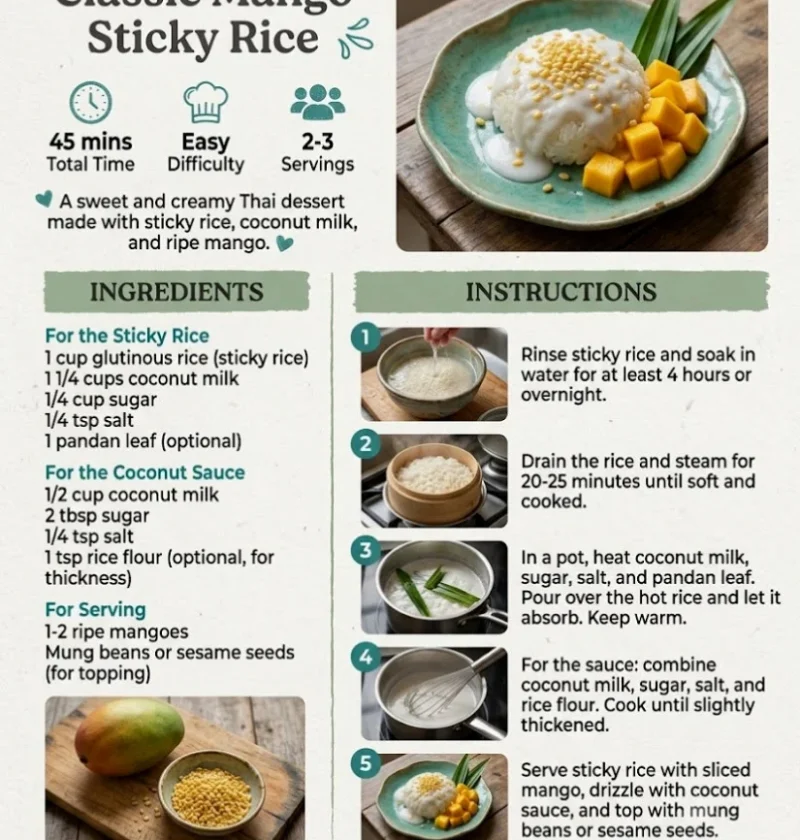
Mango Sticky Rice is a beloved Thai dessert that perfectly balances the sweetness of ripe mangoes with the rich creaminess of coconut milk and the delightful chewiness of glutinous rice. This tropical delight is not only easy to prepare but also a fantastic way to showcase the vibrant flavors of Southeast Asian cuisine. Whether you’re looking for a refreshing summer dessert idea or a unique addition to your collection of Thai dessert recipes, Mango Sticky Rice is sure to impress your guests and satisfy your sweet tooth. Each bite offers a harmonious blend of textures and flavors that make it a timeless favorite.
Ingredients
- For the sticky rice:
- 1 cup glutinous rice (also known as sticky rice, which is essential for the chewy texture)
- 1 ½ cups water (use filtered water for the best taste)
- For the coconut sauce:
- 1 cup coconut milk (preferably full-fat for a richer flavor)
- ½ cup sugar (you can adjust the sweetness to your preference)
- ¼ teaspoon salt (this enhances the coconut flavor)
- 1 teaspoon vanilla extract (optional, but adds a lovely aroma)
- For serving:
- 2 ripe mangoes, peeled, pitted, and sliced (look for mangoes with a vibrant color and slight give when pressed)
- Sesame seeds or mung beans for garnish (optional, but they add texture and visual appeal)
Note: Choose high-quality glutinous rice and ripe mangoes for the best flavor. If you can’t find glutinous rice, jasmine rice can be a suitable substitute, although the texture will differ. For a more authentic experience, consider sourcing ingredients from an Asian grocery store where you can find the freshest produce and specialty items.
Steps / Instructions
- Rinse the sticky rice: Place the glutinous rice in a bowl, cover it with water, and rinse thoroughly until the water runs clear. This process is crucial as it removes excess starch and helps the rice cook evenly, preventing it from becoming overly gummy.
- Soak the rice: After rinsing, soak the rice in clean water for at least 4 hours, or ideally overnight. This softens the grains and ensures a tender texture when cooked, making it easier for the rice to absorb the coconut sauce later. Soaking also helps to enhance the overall flavor.
- Steam the rice: Drain the soaked rice and place it in a steamer lined with cheesecloth. Steam for about 25-30 minutes, or until the grains are translucent and tender. If using a bamboo steamer, ensure the water is at a gentle simmer, as boiling water can cause the rice to cook unevenly.
- Prepare the coconut sauce: While the rice is steaming, combine the coconut milk, sugar, and salt in a small saucepan over medium heat. Stir until the sugar dissolves, and the mixture is heated through but not boiling. This step infuses the sauce with the sweetness necessary to complement the rice. Remove from heat, and add the vanilla extract if using.
- Combine rice and sauce: Once the rice is cooked, transfer it to a mixing bowl and pour about ¾ of the warm coconut sauce over it. Stir gently to combine and allow it to sit for about 15 minutes to absorb the flavors. This resting period is key for achieving that luscious, creamy texture that defines Mango Sticky Rice.
- Slice the mango: While the rice is resting, peel and slice the ripe mangoes into thin wedges, ensuring they are fresh and sweet for the best flavor pairing. A perfectly ripe mango should be juicy and fragrant, enhancing the dessert’s overall taste.
- Plate the dessert: To serve, scoop a generous portion of the sticky rice onto a plate, add slices of mango on the side, and drizzle the remaining coconut sauce over the top. Garnish with sesame seeds or mung beans if desired, adding a delightful contrast in texture and a touch of elegance.
Tips & Tricks
To ensure the best results with your Mango Sticky Rice, consider the following tips: Check out our related guide for more tips. These insights will help you perfect your technique, making this dessert a highlight of your culinary repertoire.
- Storage: Store any leftover sticky rice in an airtight container in the refrigerator for up to 3 days. To reheat, steam it again or microwave with a splash of water to maintain moisture. This is essential as it prevents the rice from drying out and losing its desirable texture.
- Make-ahead: You can prepare the sticky rice and coconut sauce a day in advance. Just keep them separated and assemble the dessert just before serving to maintain the freshness of the mangoes. Preparing ahead can save you time during gatherings.
- Avoid common mistakes: Do not skip the soaking step, as it is crucial for achieving the right texture. Additionally, ensure that the coconut milk does not boil, as this can alter the flavor and texture, leading to a less enjoyable dessert.
- Pro techniques: If you’re looking for an authentic experience, try using a bamboo steamer to cook the rice, as it allows for even steam distribution and enhances the overall flavor. The gentle steaming process helps in achieving a perfect consistency without compromising the rice’s integrity.
Variations
If you’re feeling adventurous or want to customize your Mango Sticky Rice, here are some variations to consider:
- Fruits: Try pairing the sticky rice with other tropical fruits like papaya, pineapple, or dragon fruit for a colorful presentation and a mix of flavors. This not only adds visual appeal but also introduces new taste sensations.
- Flavor enhancements: Experiment with adding pandan leaves while steaming the rice for a unique aroma and flavor. Pandan adds a beautiful green hue and a fragrant, floral taste that complements the coconut beautifully.
- Dietary alternatives: For a vegan version, ensure your sugar is unrefined and use organic coconut milk. This dessert is naturally gluten-free if you use glutinous rice, making it a delightful option for various dietary needs.
Serving Suggestions
To elevate the presentation and enjoyment of Mango Sticky Rice, consider these serving suggestions:
- Plate presentation: Use a small mold to shape the sticky rice for a refined look when serving. A simple round mold works beautifully, providing an elegant touch to your dessert that impresses guests.
- Complementary dishes: Serve alongside a refreshing Thai iced tea or a light fruit salad to balance the richness of the coconut milk. These beverages can enhance the overall dining experience and provide a refreshing contrast.
- Garnishing: Fresh mint leaves or toasted coconut flakes can add a beautiful touch to your dessert. These garnishes not only enhance the visual appeal but also add an extra layer of flavor and texture.
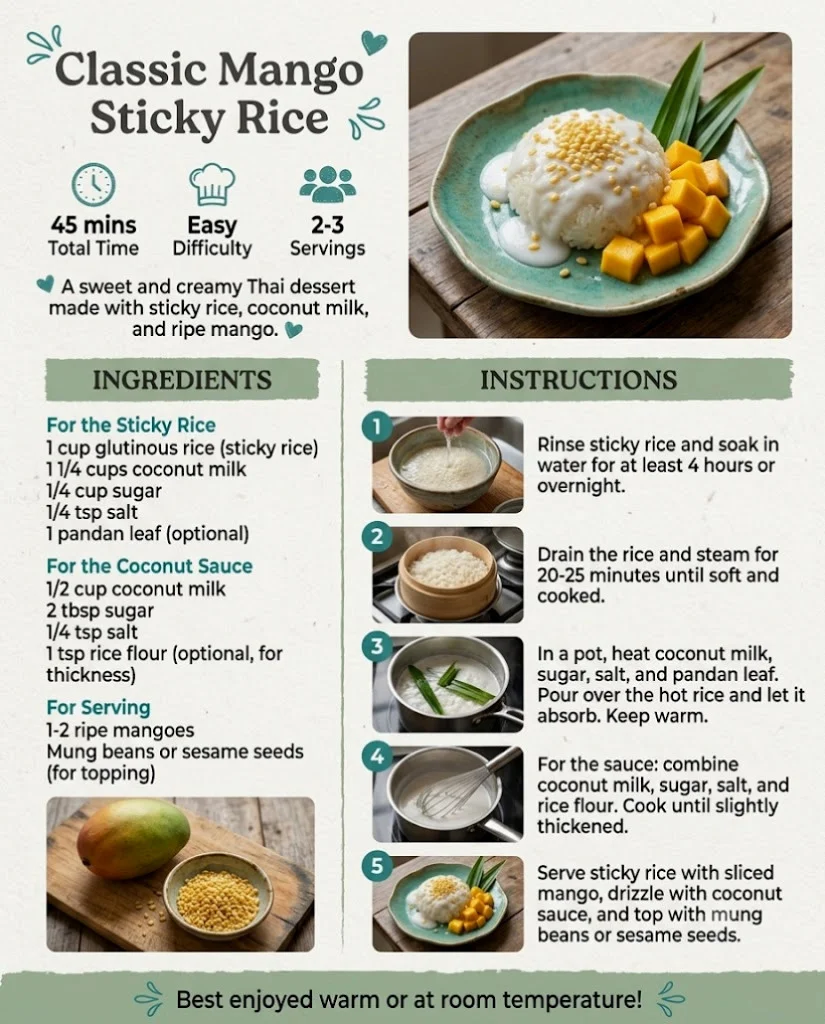
Mango Sticky Rice
Mango Sticky Rice is a beloved Thai dessert that perfectly balances the sweetness of ripe mangoes with the rich creaminess of coconut milk and the delightful chewiness of glutinous rice.
Ingredients
- 1 cup glutinous rice
- 1 ½ cups water
- 1 cup coconut milk
- ½ cup sugar
- ¼ teaspoon salt
- 1 teaspoon vanilla extract
- 2 ripe mangoes, peeled, pitted, and sliced
- Sesame seeds or mung beans for garnish
Directions
Rinse the sticky rice: Place the glutinous rice in a bowl, cover it with water, and rinse thoroughly until the water runs clear.
Soak the rice: After rinsing, soak the rice in clean water for at least 4 hours, or ideally overnight.
Steam the rice: Drain the soaked rice and place it in a steamer lined with cheesecloth. Steam for about 25-30 minutes.
Prepare the coconut sauce: Combine the coconut milk, sugar, and salt in a saucepan over medium heat until the sugar dissolves.
Combine rice and sauce: Once the rice is cooked, pour about ¾ of the coconut sauce over it and stir gently. Let it sit for 15 minutes.
Slice the mango: Peel and slice the ripe mangoes into thin wedges.
Plate the dessert: Scoop sticky rice onto a plate, add mango slices, and drizzle the remaining coconut sauce over the top.
Recipe Reviews
- ★★★★★
Excellent recipe!
Leave a Reply
Your email address will not be published. Required fields are marked *