
Indulge in the delightful layers of creamy sweetness with these Banana Pudding Cheesecake Cups. This easy, no-bake dessert combines the nostalgic flavors of traditional banana pudding with the rich, velvety texture of cheesecake. Perfect for summer gatherings or as a quick and easy treat to satisfy your sweet tooth, these individual serving desserts are sure to be a hit with both kids and adults alike! When served in charming cups, they not only taste delicious but also make for a visually appealing dessert that can elevate any dining experience.
Ingredients
- For the Vanilla Wafer Crust:
- 1 ½ cups vanilla wafer crumbs
- ½ cup unsalted butter, melted
- 2 tablespoons granulated sugar
- For the Cream Cheese Filling:
- 8 ounces cream cheese, softened
- ½ cup powdered sugar
- 1 teaspoon vanilla extract
- 1 cup heavy whipping cream
- For the Banana Pudding Layer:
- 2 cups instant vanilla pudding mix
- 4 cups whole milk
- 3 ripe bananas, sliced
- For Topping:
- Whipped cream
- Additional banana slices
- Crushed vanilla wafers
Note: For a gluten-free option, use gluten-free vanilla wafers. Ensure that the cream cheese is at room temperature for easy mixing; this step is crucial as it helps avoid lumps in the filling. You can learn more about this topic and explore the delightful balance of flavors that make these Banana Pudding Cheesecake Cups a go-to dessert.
Steps / Instructions
- Prepare the Vanilla Wafer Crust: In a medium bowl, combine the vanilla wafer crumbs, melted butter, and granulated sugar. Mix until well combined and the crumbs are evenly moistened, resembling wet sand. This will create a sturdy base for your cheesecake cups.
- Form the Crust: Spoon about 2 tablespoons of the crumb mixture into the bottom of each serving cup or dish. Press down firmly to create an even layer, ensuring the crust is packed tightly to hold together. Set aside while you prepare the filling.
- Make the Cream Cheese Filling: In a large bowl, beat the softened cream cheese with an electric mixer until smooth and creamy, about 2 minutes. Gradually add the powdered sugar and vanilla extract, mixing until fully incorporated; the mixture should be free of lumps for a silky texture.
- Whip the Cream: In a separate bowl, whip the heavy cream until stiff peaks form, which usually takes about 3-5 minutes. Gently fold the whipped cream into the cream cheese mixture until smooth and creamy. This step is essential to achieve the light and airy texture that distinguishes these Banana Pudding Cheesecake Cups.
- Combine Layers: Evenly distribute the cream cheese filling over each crust layer in your cups, smoothing the top with a spatula for a clean finish. Ensure each cup has a generous amount of filling for a satisfying bite.
- Prepare the Banana Pudding: In a large bowl, whisk the instant vanilla pudding mix with whole milk for about 2 minutes or until it thickens considerably. Allow it to sit for a couple of minutes to further set, achieving a luscious consistency.
- Layer the Bananas: Add a few slices of banana on top of the cream cheese filling in each cup. Then, spoon the banana pudding mixture over the bananas, filling each cup to the top, ensuring the layers are visible and enticing.
- Chill the Cups: Cover the cups with plastic wrap and refrigerate for at least 4 hours, or preferably overnight. This chilling time allows the flavors to meld beautifully and gives the dessert a firmer structure.
- Serve: Just before serving, add a dollop of whipped cream on top of each cup, garnishing with additional banana slices and crushed vanilla wafers for an appealing finish. This final touch adds texture and visual flair.
Tips & Tricks
- Storage: Keep the Banana Pudding Cheesecake Cups covered in the refrigerator for up to 3 days. The bananas may brown slightly due to oxidation, but the flavor remains delicious, and the dessert holds up well.
- Make-Ahead: These dessert cups are perfect for making ahead of time. Prepare them a day in advance for a hassle-free dessert on the day of your event; they taste even better after a night in the fridge as the flavors deepen.
- Common Mistakes to Avoid: Ensure the cream cheese is softened before mixing to avoid lumps. Also, don’t overmix the whipped cream to maintain its light texture; you want to preserve the airiness that makes these cups delightful.
- Pro Technique: Use a piping bag to fill the cups with the cream cheese mixture and banana pudding for a more elegant presentation. This technique not only looks professional but also makes filling the cups easier and more precise.
Variations
- Banana Cheesecake Variations: Add a layer of caramel sauce or chocolate sauce for extra flavor. You can also incorporate chopped nuts for added crunch, which contrasts nicely with the silky filling.
- Dairy-Free Option: Substitute the cream cheese with a dairy-free alternative and use coconut cream instead of heavy cream for a similar texture that caters to lactose-intolerant friends.
- Flavor Combinations: Try adding crushed pineapple for a tropical twist or mix in some peanut butter for a delicious flavor combination with bananas. These variations can transform the dessert into a whole new experience.
Serving Suggestions
- These Banana Pudding Cheesecake Cups are perfect as stand-alone desserts but can also be served alongside fresh berries or a scoop of vanilla ice cream. The freshness of the berries complements the rich flavors beautifully.
- For a whimsical touch, serve with colorful striped straws and plates for a summer party feel, enhancing the presentation and making the serving experience more fun for guests.
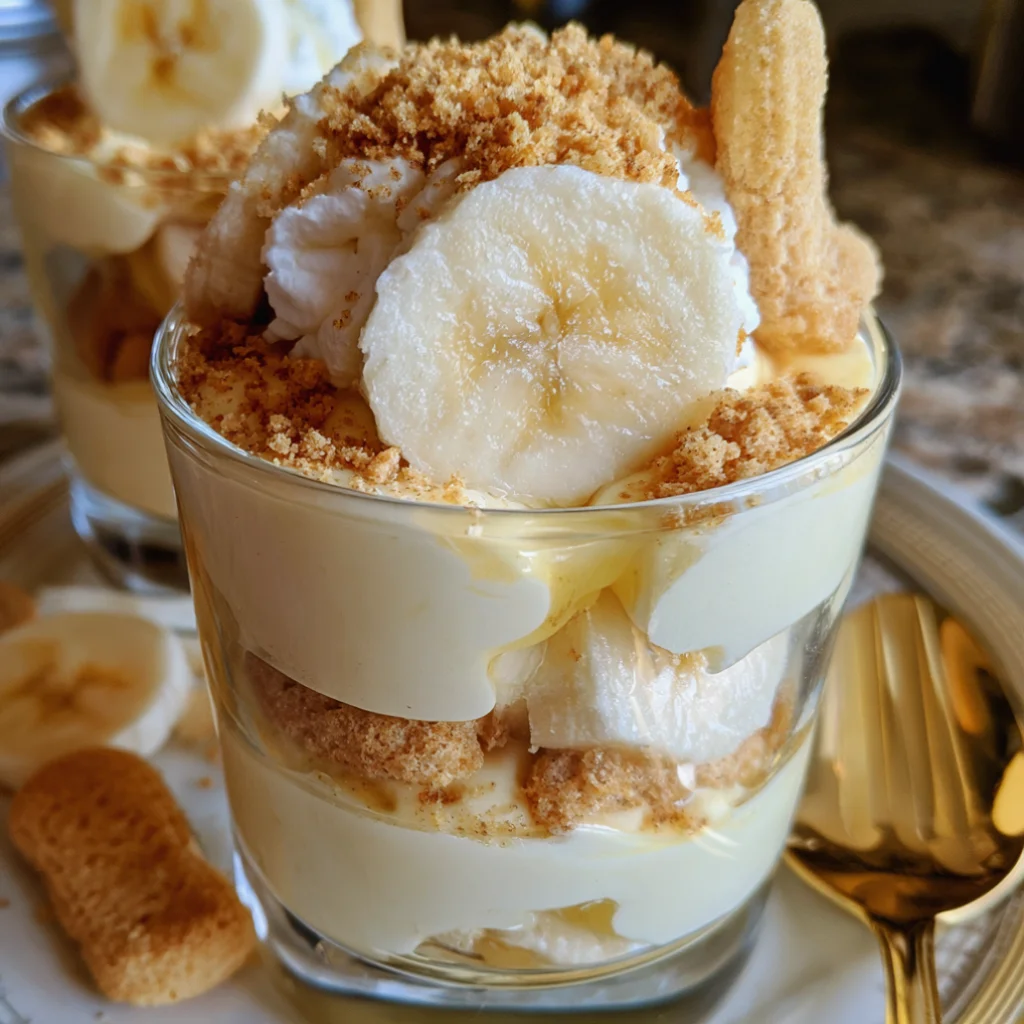
Banana Pudding Cheesecake Cups
Indulge in the delightful layers of creamy sweetness with these Banana Pudding Cheesecake Cups. This easy, no-bake dessert combines the nostalgic flavors of traditional banana pudding with the rich, velvety texture of cheesecake. Perfect for summer gatherings or as a quick and easy treat to satisfy your sweet tooth, these individual serving desserts are sure to be a hit with both kids and adults alike! When served in charming cups, they not only taste delicious but also make for a visually appealing dessert that can elevate any dining experience.
Ingredients
- 1 ½ cups vanilla wafer crumbs
- ½ cup unsalted butter, melted
- 2 tablespoons granulated sugar
- 8 ounces cream cheese, softened
- ½ cup powdered sugar
- 1 teaspoon vanilla extract
- 1 cup heavy whipping cream
- 2 cups instant vanilla pudding mix
- 4 cups whole milk
- 3 ripe bananas, sliced
- Whipped cream
- Additional banana slices
- Crushed vanilla wafers
Directions
In a medium bowl, combine the vanilla wafer crumbs, melted butter, and granulated sugar. Mix until well combined and the crumbs are evenly moistened, resembling wet sand.
Spoon about 2 tablespoons of the crumb mixture into the bottom of each serving cup or dish. Press down firmly to create an even layer.
In a large bowl, beat the softened cream cheese with an electric mixer until smooth and creamy. Gradually add the powdered sugar and vanilla extract, mixing until fully incorporated.
In a separate bowl, whip the heavy cream until stiff peaks form. Gently fold the whipped cream into the cream cheese mixture until smooth.
Evenly distribute the cream cheese filling over each crust layer in your cups.
In a large bowl, whisk the instant vanilla pudding mix with whole milk for about 2 minutes or until it thickens considerably.
Add a few slices of banana on top of the cream cheese filling in each cup, then spoon the banana pudding mixture over the bananas.
Cover the cups with plastic wrap and refrigerate for at least 4 hours, or preferably overnight.
Just before serving, add a dollop of whipped cream on top of each cup, garnishing with additional banana slices and crushed vanilla wafers.
Recipe Reviews
- ★★★★★
Excellent recipe!
Leave a Reply
Your email address will not be published. Required fields are marked *


