Introduction
Welcome to the delightful world of Oreo IceBox Cake! If you’re a fan of the iconic Oreo cookies and crave a luscious, no-bake dessert, you’re in for a treat. This recipe combines the beloved flavors of Oreos with a creamy, dreamy texture that will have you coming back for seconds. Whether you’re hosting a summer gathering or simply want to satisfy your sweet tooth, this Oreo IceBox Cake is sure to impress.
What makes this recipe truly special is its simplicity and versatility. With just a few basic ingredients and minimal effort, you can create a show-stopping dessert that looks as good as it tastes. The combination of crunchy Oreos and velvety whipped cream creates a heavenly contrast of textures that will have your taste buds dancing with joy.
While the origins of the IceBox Cake are not entirely clear, this nostalgic dessert has been a favorite for generations. Its no-fuss preparation and decadent flavor make it a timeless classic that never goes out of style. Whether you’re a seasoned baker or a novice in the kitchen, this recipe is perfect for all skill levels.
So, grab your Oreos and get ready to embark on a culinary adventure that will leave you craving more!
Why You’ll Love This Recipe
If you’re looking for an easy-to-make dessert that requires minimal effort and delivers maximum flavor, this Oreo IceBox Cake is the perfect choice. Here are a few reasons why you’ll fall in love with this recipe:
The simplicity of this recipe makes it ideal for busy days when you want a delicious treat without spending hours in the kitchen. With just a handful of ingredients, you can whip up a dessert that will wow your family and friends.
This Oreo IceBox Cake is a great option for those with dietary restrictions, as it can easily be adapted to be gluten-free or vegan. By using gluten-free or dairy-free alternatives, you can enjoy this decadent dessert without any compromises on taste.
The make-ahead nature of this dessert makes it perfect for entertaining. You can prepare the Oreo IceBox Cake in advance and let it chill in the fridge until you’re ready to serve, giving you more time to focus on other aspects of your meal.
The combination of chocolatey Oreos and fluffy whipped cream creates a harmonious blend of flavors and textures that will delight your taste buds. Each bite is a symphony of sweetness and crunch, making this dessert a truly indulgent treat.
Ingredients
Here are the ingredients you’ll need to make this scrumptious Oreo IceBox Cake:
– 1 package of Oreo cookies (regular or double-stuffed) – 2 cups heavy cream – 1/4 cup powdered sugar – 1 teaspoon vanilla extract – Chocolate shavings or additional Oreos for garnish (optional)
For a twist on the classic recipe, you can also experiment with flavored Oreos, such as mint or peanut butter, to add a unique touch to your dessert. Feel free to get creative with your ingredient choices to customize the flavor to your liking.
Now that you have all your ingredients ready, let’s dive into the step-by-step instructions for making this irresistible Oreo IceBox Cake!
Step-by-Step Instructions
1. In a large mixing bowl, whip the heavy cream until stiff peaks form. Be careful not to overmix, as the cream can turn into butter if whipped for too long.
2. Gently fold in the powdered sugar and vanilla extract until well combined. The sweetened whipped cream should be light and fluffy, with a hint of vanilla flavor.
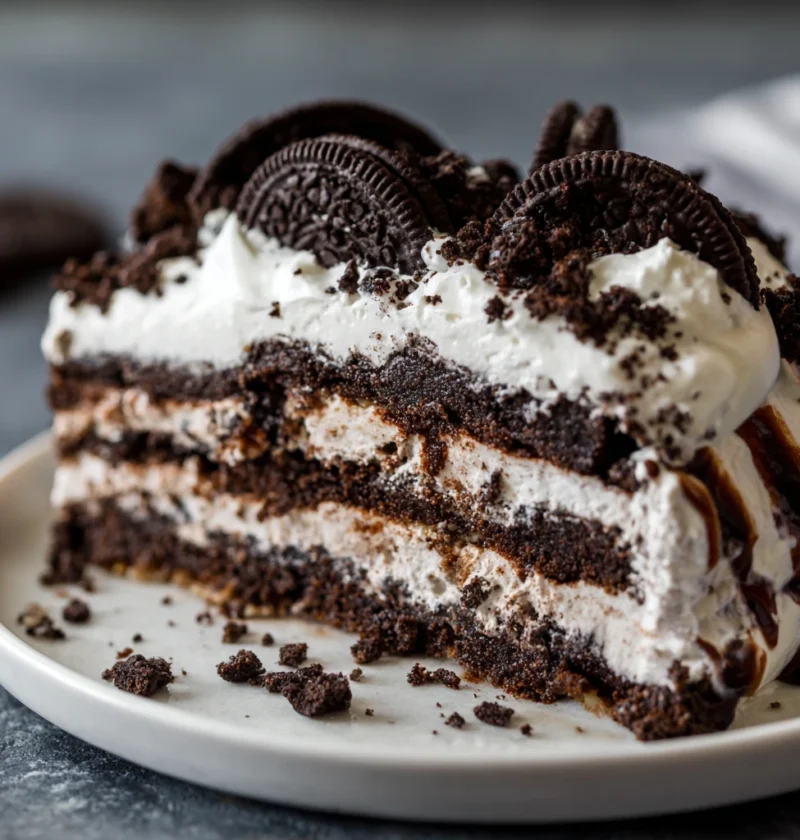
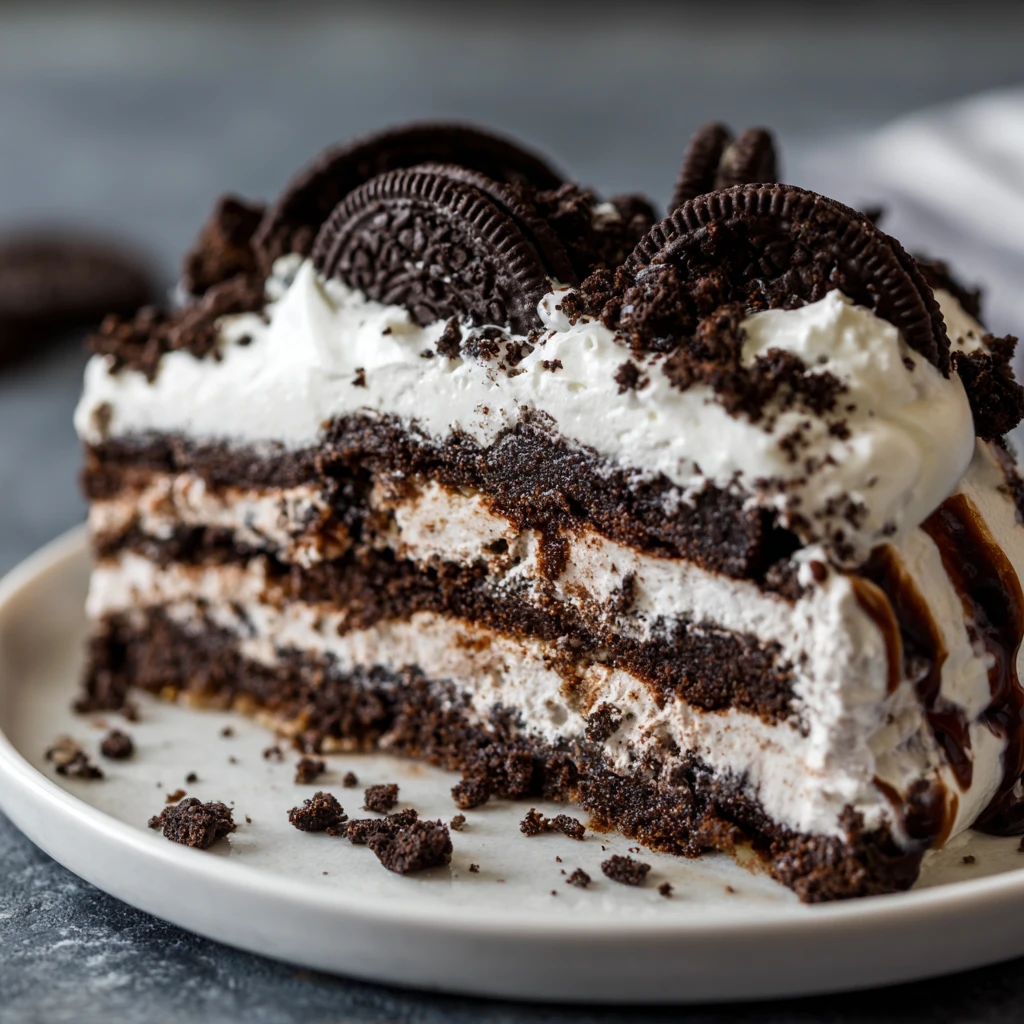
3. To assemble the cake, spread a thin layer of the whipped cream in the bottom of a 9×13-inch baking dish. This will serve as the base of your Oreo IceBox Cake.
4. Arrange a layer of Oreo cookies on top of the whipped cream, ensuring they are evenly spaced and covering the entire surface. You can use whole cookies or crush them slightly for a more compact layer.
5. Continue layering whipped cream and Oreo cookies until you reach the top of the dish, finishing with a final layer of whipped cream on top. Smooth out the top layer for a clean finish.
6. If desired, garnish the Oreo IceBox Cake with chocolate shavings or additional crushed Oreos for a decorative touch. Cover the dish with plastic wrap and refrigerate for at least 4 hours, or overnight, to allow the flavors to meld together.
7. Once chilled, slice the Oreo IceBox Cake into squares and serve cold. Enjoy the creamy, chocolatey goodness with your loved ones and bask in the compliments that are sure to follow!
Expert Tips for Success
• For a richer flavor, you can add a layer of chocolate ganache between the whipped cream and Oreo cookies. • To speed up the chilling process, place the Oreo IceBox Cake in the freezer for 1-2 hours before serving. • Experiment with different Oreo flavors and toppings to create unique variations of this classic dessert.
By following these expert tips, you can elevate your Oreo IceBox Cake to new heights and impress even the most discerning dessert connoisseurs.
Variations and Substitutions
If you’re looking to put a creative spin on the traditional Oreo IceBox Cake, here are some variations and substitutions you can try:
– Swap out the vanilla extract for almond or peppermint extract to add a different flavor profile to the whipped cream. – Use crushed nuts, such as almonds or pecans, as a crunchy topping for added texture and flavor. – Incorporate layers of fresh berries, such as raspberries or strawberries, between the Oreo cookies for a fruity twist.
Feel free to mix and match these variations to create a customized Oreo IceBox Cake that suits your taste preferences and dietary needs.
Serving Suggestions
To make the most of your Oreo IceBox Cake experience, consider serving it with a dollop of whipped cream and a sprinkle of crushed Oreos on top. You can also pair this decadent dessert with a scoop of vanilla ice cream or a drizzle of chocolate sauce for an extra indulgent touch.
For a refreshing contrast, serve the Oreo IceBox Cake with a side of fresh fruit salad or a glass of cold milk. The creamy sweetness of the cake pairs perfectly with the tartness of the fruit, creating a well-balanced dessert ensemble.
Whether you’re enjoying this dessert at a casual gathering or a special occasion, these serving suggestions will enhance the overall dining experience and leave your guests craving more.
FAQs
Q: Can I use store-bought whipped topping instead of homemade whipped cream? A: Yes, you can substitute store-bought whipped topping for homemade whipped cream if you’re short on time. However, homemade whipped cream will yield a fresher and creamier texture.
Q: How long can the Oreo IceBox Cake be stored in the refrigerator? A: The Oreo IceBox Cake can be stored in the refrigerator for up to 3 days. Be sure to cover it tightly with plastic wrap to prevent the whipped cream from absorbing any odors from the fridge.
Q: Can I freeze the Oreo IceBox Cake for longer storage? A: While the Oreo IceBox Cake is best enjoyed fresh, you can freeze it for up to 1 month in an airtight container. Thaw it in the refrigerator overnight before serving to maintain the best texture.
With these FAQs, you’ll have all the information you need to ensure your Oreo IceBox Cake turns out perfectly every time.
Final Thoughts
In conclusion, the Oreo IceBox Cake is a delightful dessert that combines the classic flavors of Oreos with a creamy, indulgent texture that is sure to please any palate. Whether you’re a fan of no-bake desserts or simply looking for a quick and easy treat, this recipe is a winner.
From its effortless preparation to its rich and satisfying taste, the Oreo IceBox Cake is a crowd-pleaser that will become a staple in your dessert repertoire. So, gather your ingredients, follow the simple instructions, and get ready to savor every bite of this irresistible sweet treat.
We hope this article has inspired you to try your hand at making this delectable Oreo IceBox Cake and share it with your loved ones. Happy baking!
Oreo IceBox Cake
A delightful no-bake dessert that combines the iconic flavors of Oreo cookies with a creamy, dreamy texture. This Oreo IceBox Cake is a crowd-pleaser suitable for any occasion, offering a harmonious blend of chocolatey Oreos and fluffy whipped cream.
Ingredients
- 1 package of Oreo cookies (regular or double-stuffed)
- 2 cups heavy cream
- 1/4 cup powdered sugar
- 1 teaspoon vanilla extract
- Chocolate shavings or additional Oreos for garnish (optional)
Directions
-
In a large mixing bowl, whip the heavy cream until stiff peaks form.
-
Gently fold in the powdered sugar and vanilla extract until well combined.
-
Spread a thin layer of the whipped cream in the bottom of a 9×13-inch baking dish.
-
Arrange a layer of Oreo cookies on top of the whipped cream.
-
Continue layering whipped cream and Oreo cookies until you reach the top of the dish.
-
Smooth out the top layer, garnish with chocolate shavings or crushed Oreos.
-
Cover with plastic wrap and refrigerate for at least 4 hours.
-
Slice into squares and serve cold.