Introduction
Are you ready to add a spooky twist to your Halloween celebrations? Look no further than these homemade spider cookies! Perfect for kids’ parties or themed gatherings, these chocolatey delights are not only delicious but also a fun baking project for the whole family. In this article, we’ll explore an easy spider cookies recipe that will have you crawling back for more.
Creating your own spider cookies allows you to customize the flavors, decorations, and even dietary preferences to suit your needs. Whether you’re a baking enthusiast or a novice in the kitchen, this recipe is designed to be approachable and enjoyable for all. Let’s dive into the world of homemade spider cookies and discover how these sweet treats can elevate your Halloween festivities.
While spider cookies may seem like a modern Halloween creation, the tradition of decorating sweets with creepy-crawly themes dates back centuries. By crafting your own spider cookies, you’re participating in a time-honored custom of festive baking that brings joy and excitement to those who indulge in these delightful treats.
Get ready to unleash your creativity and satisfy your sweet tooth with our easy spider cookies recipe. From the first bite to the last crumb, these delectable treats are sure to become a favorite at any Halloween gathering.
Why You’ll Love This Recipe
Our homemade spider cookies Halloween recipe combines the perfect balance of chocolatey goodness and spooky aesthetics. These treats are not only visually appealing but also incredibly tasty, making them a hit with both kids and adults alike. The ease of preparation and the ability to customize each cookie to your liking are additional reasons why you’ll fall in love with this recipe.
For those with dietary restrictions, fear not! Our spider cookies can be easily adapted to suit various needs. Whether you’re looking for gluten-free options or vegan alternatives, this recipe offers flexibility without compromising on flavor or texture. Say goodbye to store-bought spider cookies and embrace the satisfaction of creating your own unique batch at home.
With just a few simple ingredients, you can whip up a batch of these delightful treats in no time. The combination of rich chocolate, crispy pretzel legs, and a hint of sweetness make these spider cookies a standout dessert for any occasion. Get ready to impress your guests with a plate full of these charming arachnids!
So, if you’re searching for the perfect treat that is both delicious and entertaining, look no further than our homemade spider cookies recipe. Let your culinary skills shine as you embark on a baking adventure that promises to delight and enchant all who partake.
Ingredients
To bring these delightful spider cookies to life, gather the following ingredients:
– All-purpose flour
– Cocoa powder
– Baking soda
– Salt
– Unsalted butter
– Granulated sugar
– Brown sugar
– Egg
– Vanilla extract
– Chocolate chips
– Pretzel sticks
– Candy eyes
Feel free to substitute any ingredients to accommodate dietary restrictions or personal preferences. For a gluten-free version, use a gluten-free flour blend. To make vegan spider cookies, replace the egg with a flax egg and use dairy-free chocolate chips. Get creative with your ingredient choices to make these spider cookies truly your own.
Step-by-Step Instructions
1. Preheat your oven to 350°F (175°C) and line a baking sheet with parchment paper.
2. In a bowl, whisk together the flour, cocoa powder, baking soda, and salt until well combined.
3. In a separate bowl, cream together the butter, granulated sugar, and brown sugar until light and fluffy.
4. Add the egg and vanilla extract to the butter mixture, mixing until smooth.
5. Gradually add the dry ingredients to the wet ingredients, mixing until a dough forms.
6. Fold in the chocolate chips until evenly distributed throughout the dough.
7. Scoop tablespoon-sized portions of dough and roll them into balls. Place them on the prepared baking sheet.
8. Bake the cookies for 10-12 minutes or until set. Remove from the oven and let them cool slightly.
9. While the cookies are still warm, gently press pretzel sticks into the sides to create spider legs.
10. Place two candy eyes on the front of each cookie to complete the spider look.
11. Allow the cookies to cool completely before serving and enjoying these adorable spider treats.
Expert Tips for Success
For the best results when making spider cookies, consider the following tips:
– Chill the cookie dough for 30 minutes before baking to prevent spreading.
– Use a small ice cream scoop to portion out the dough evenly for uniform cookies.
– Experiment with different types of chocolate chips or add-ins to customize your cookies.
– If you don’t have candy eyes, you can use small dabs of frosting or icing as substitutes.
– Store any leftover cookies in an airtight container to maintain freshness and flavor.
– Get creative with decorating your spider cookies by using colored icing or sprinkles for added flair.
By following these expert tips, you’ll be well on your way to creating the perfect batch of spider cookies that are sure to impress your guests and tantalize their taste buds.
Variations and Substitutions
Looking to switch up your spider cookies recipe? Here are some creative variations and substitutions to try:
– Swap the chocolate chips for white chocolate chips or peanut butter chips for a different flavor profile.
– Use crushed pretzels or nuts instead of whole pretzel sticks for a crunchy texture.
– Drizzle melted chocolate over the cooled cookies for an added touch of sweetness.
– Add a pinch of cinnamon or chili powder to the dough for a unique flavor twist.
– Experiment with different types of candy eyes or decorations to give your spiders distinct personalities.
– Make mini spider cookies by using smaller portions of dough and pretzel legs for bite-sized treats.
Feel free to get creative in the kitchen and customize your spider cookies to suit your taste preferences and dietary needs. The possibilities are endless when it comes to making these delightful treats your own.
Serving Suggestions
When it comes to serving your homemade spider cookies, consider the following suggestions:
– Arrange the cookies on a festive platter or tray for a visually appealing presentation.
– Pair the cookies with a glass of cold milk or a cup of hot cocoa for a classic combination.
– Serve the spider cookies alongside other Halloween-themed treats for a fun dessert spread.
– Package individual cookies in clear bags tied with ribbon for party favors or gifts.
– Display the cookies on a decorative cake stand or tiered tray as a centerpiece for your Halloween table.
However you choose to serve your spider cookies, be sure to enjoy them in good company and savor the delicious flavors and textures of these charming arachnids.
FAQs
Q: Can I make these spider cookies ahead of time?
A: Yes, you can prepare the cookie dough in advance and refrigerate it until you’re ready to bake. You can also bake the cookies ahead of time and store them in an airtight container for up to a week.
Q: How can I make gluten-free spider cookies?
A: To make gluten-free spider cookies, simply use a gluten-free flour blend in place of all-purpose flour. Ensure all other ingredients are gluten-free as well.
Q: Can I freeze these spider cookies?
A: Yes, you can freeze baked spider cookies in a freezer-safe container for up to three months. Thaw them at room temperature before serving.
Q: How can I make vegan spider cookies?
A: To make vegan spider cookies, substitute the egg with a flax egg (1 tablespoon ground flaxseed mixed with 3 tablespoons water) and use dairy-free chocolate chips and butter.
Q: What is the best way to store leftover spider cookies?
A: Store leftover spider cookies in an airtight container at room temperature for up to a week. For longer storage, freeze the cookies and thaw as needed.
Final Thoughts
As you embark on your spider cookies baking adventure, remember to have fun, get creative, and enjoy the process of crafting these delightful treats. Whether you’re making them for a Halloween party, a kids’ gathering, or simply to satisfy your sweet tooth, these homemade spider cookies are sure to bring joy and excitement to all who taste them.
With our easy-to-follow recipe and helpful tips, you’ll be well-equipped to create a batch of spider cookies that look impressive and taste delicious. So, gather your ingredients, preheat your oven, and let the magic of baking unfold as you bring these charming arachnids to life in your own kitchen.
Don’t forget to share your spider cookies with friends and family, and spread the Halloween spirit with these delightful treats. Whether you’re a seasoned baker or a novice in the kitchen, making spider cookies is a rewarding experience that will leave you with lasting memories and satisfied taste buds. Happy baking!
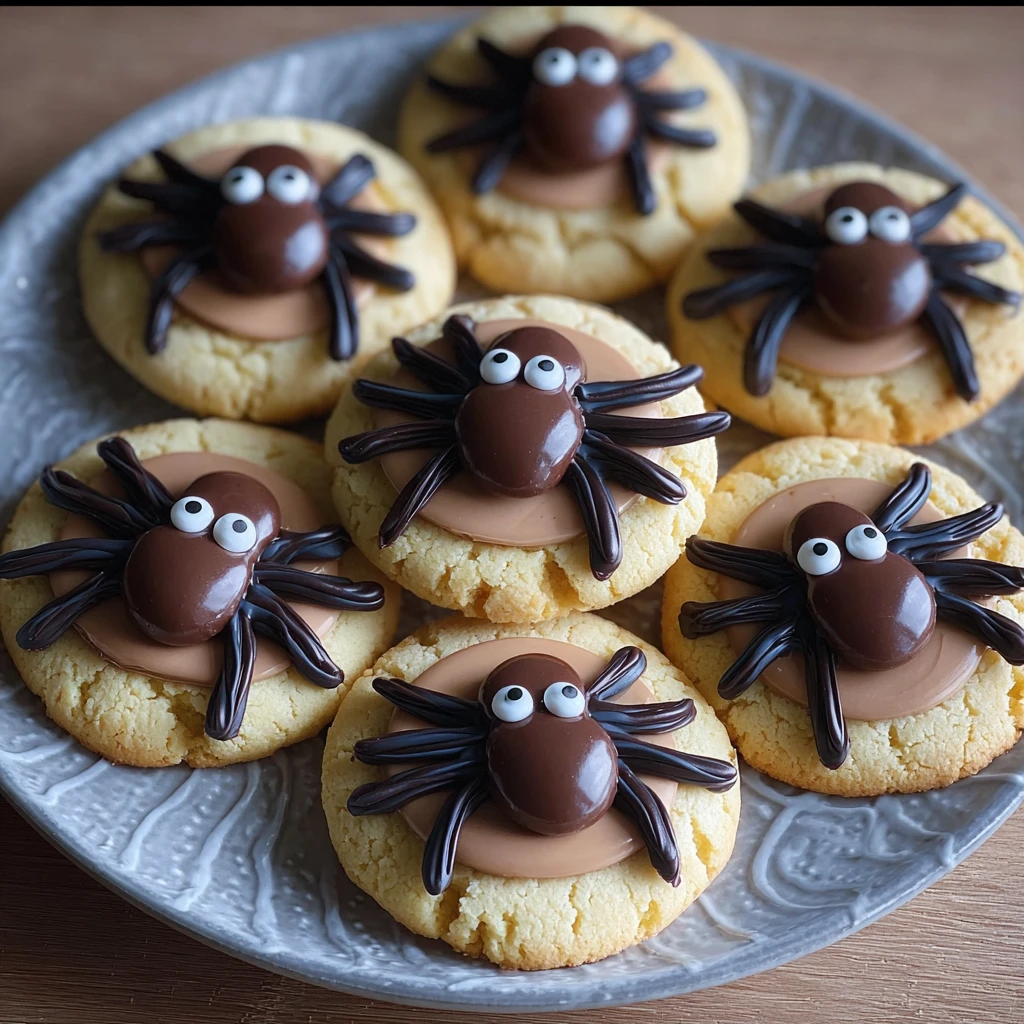
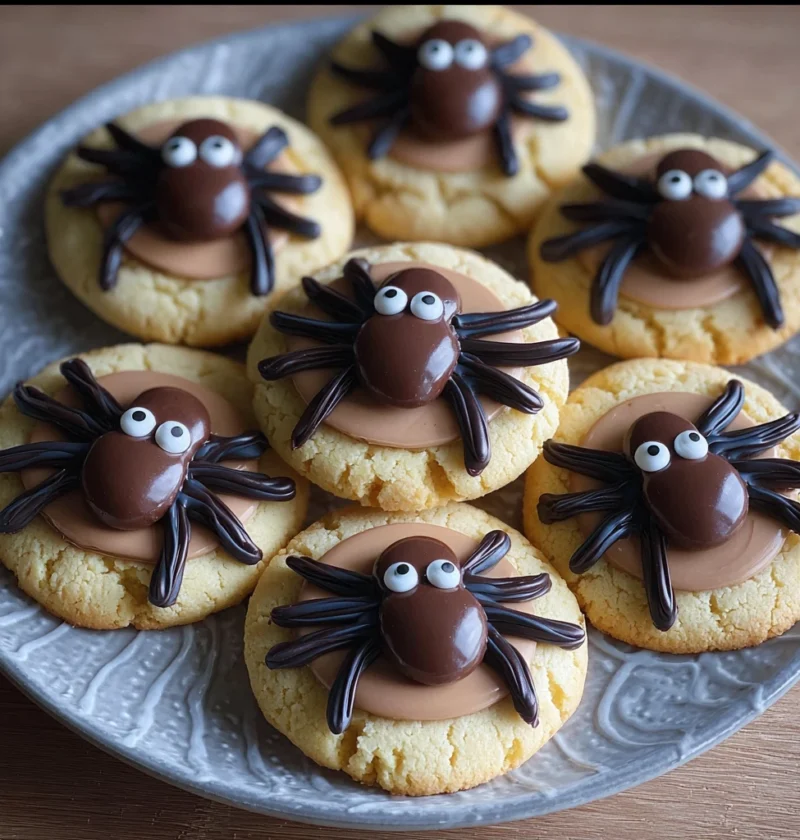
Spider Cookies
These homemade spider cookies are perfect for Halloween celebrations, combining chocolatey goodness with a spooky twist. They are visually appealing, delicious, and a fun baking project for all ages.
Ingredients
- 1 cup all-purpose flour
- 1/4 cup cocoa powder
- 1/2 tsp baking soda
- 1/4 tsp salt
- 1/2 cup unsalted butter
- 1/2 cup granulated sugar
- 1/2 cup brown sugar
- 1 egg
- 1 tsp vanilla extract
- 1/2 cup chocolate chips
- 24 pretzel sticks
- 24 candy eyes
Directions
-
Preheat the oven to 350°F (175°C) and line a baking sheet with parchment paper.
-
Whisk together flour, cocoa powder, baking soda, and salt in a bowl.
-
Cream butter, granulated sugar, and brown sugar in a separate bowl until light and fluffy.
-
Add the egg and vanilla extract to the butter mixture, mixing until smooth.
-
Gradually add the dry ingredients to the wet ingredients to form a dough.
-
Fold in chocolate chips until evenly distributed.
-
Scoop tablespoon-sized portions of dough, roll into balls, and place on the baking sheet.
-
Bake for 10-12 minutes until set. Let cool slightly.
-
Press pretzel sticks into the sides of the warm cookies to create spider legs.
-
Place two candy eyes on the front of each cookie to complete the spider look.
-
Allow the cookies to cool completely before serving.